How to Install Shaders to Your Minecraft Client
This article shows you step-by-step on how to install Shaders on your client-side.

In this guide we’ll be installing Shaders to your Minecraft client. Shaders are enhancements that improve the game’s visual appearance by altering how light, shadows, and textures are rendered.
👉
NOTE: Shaders cannot be installed on a server and are only a client-side modification.
How to Install Shaders to Your Minecraft Client using CurseForge
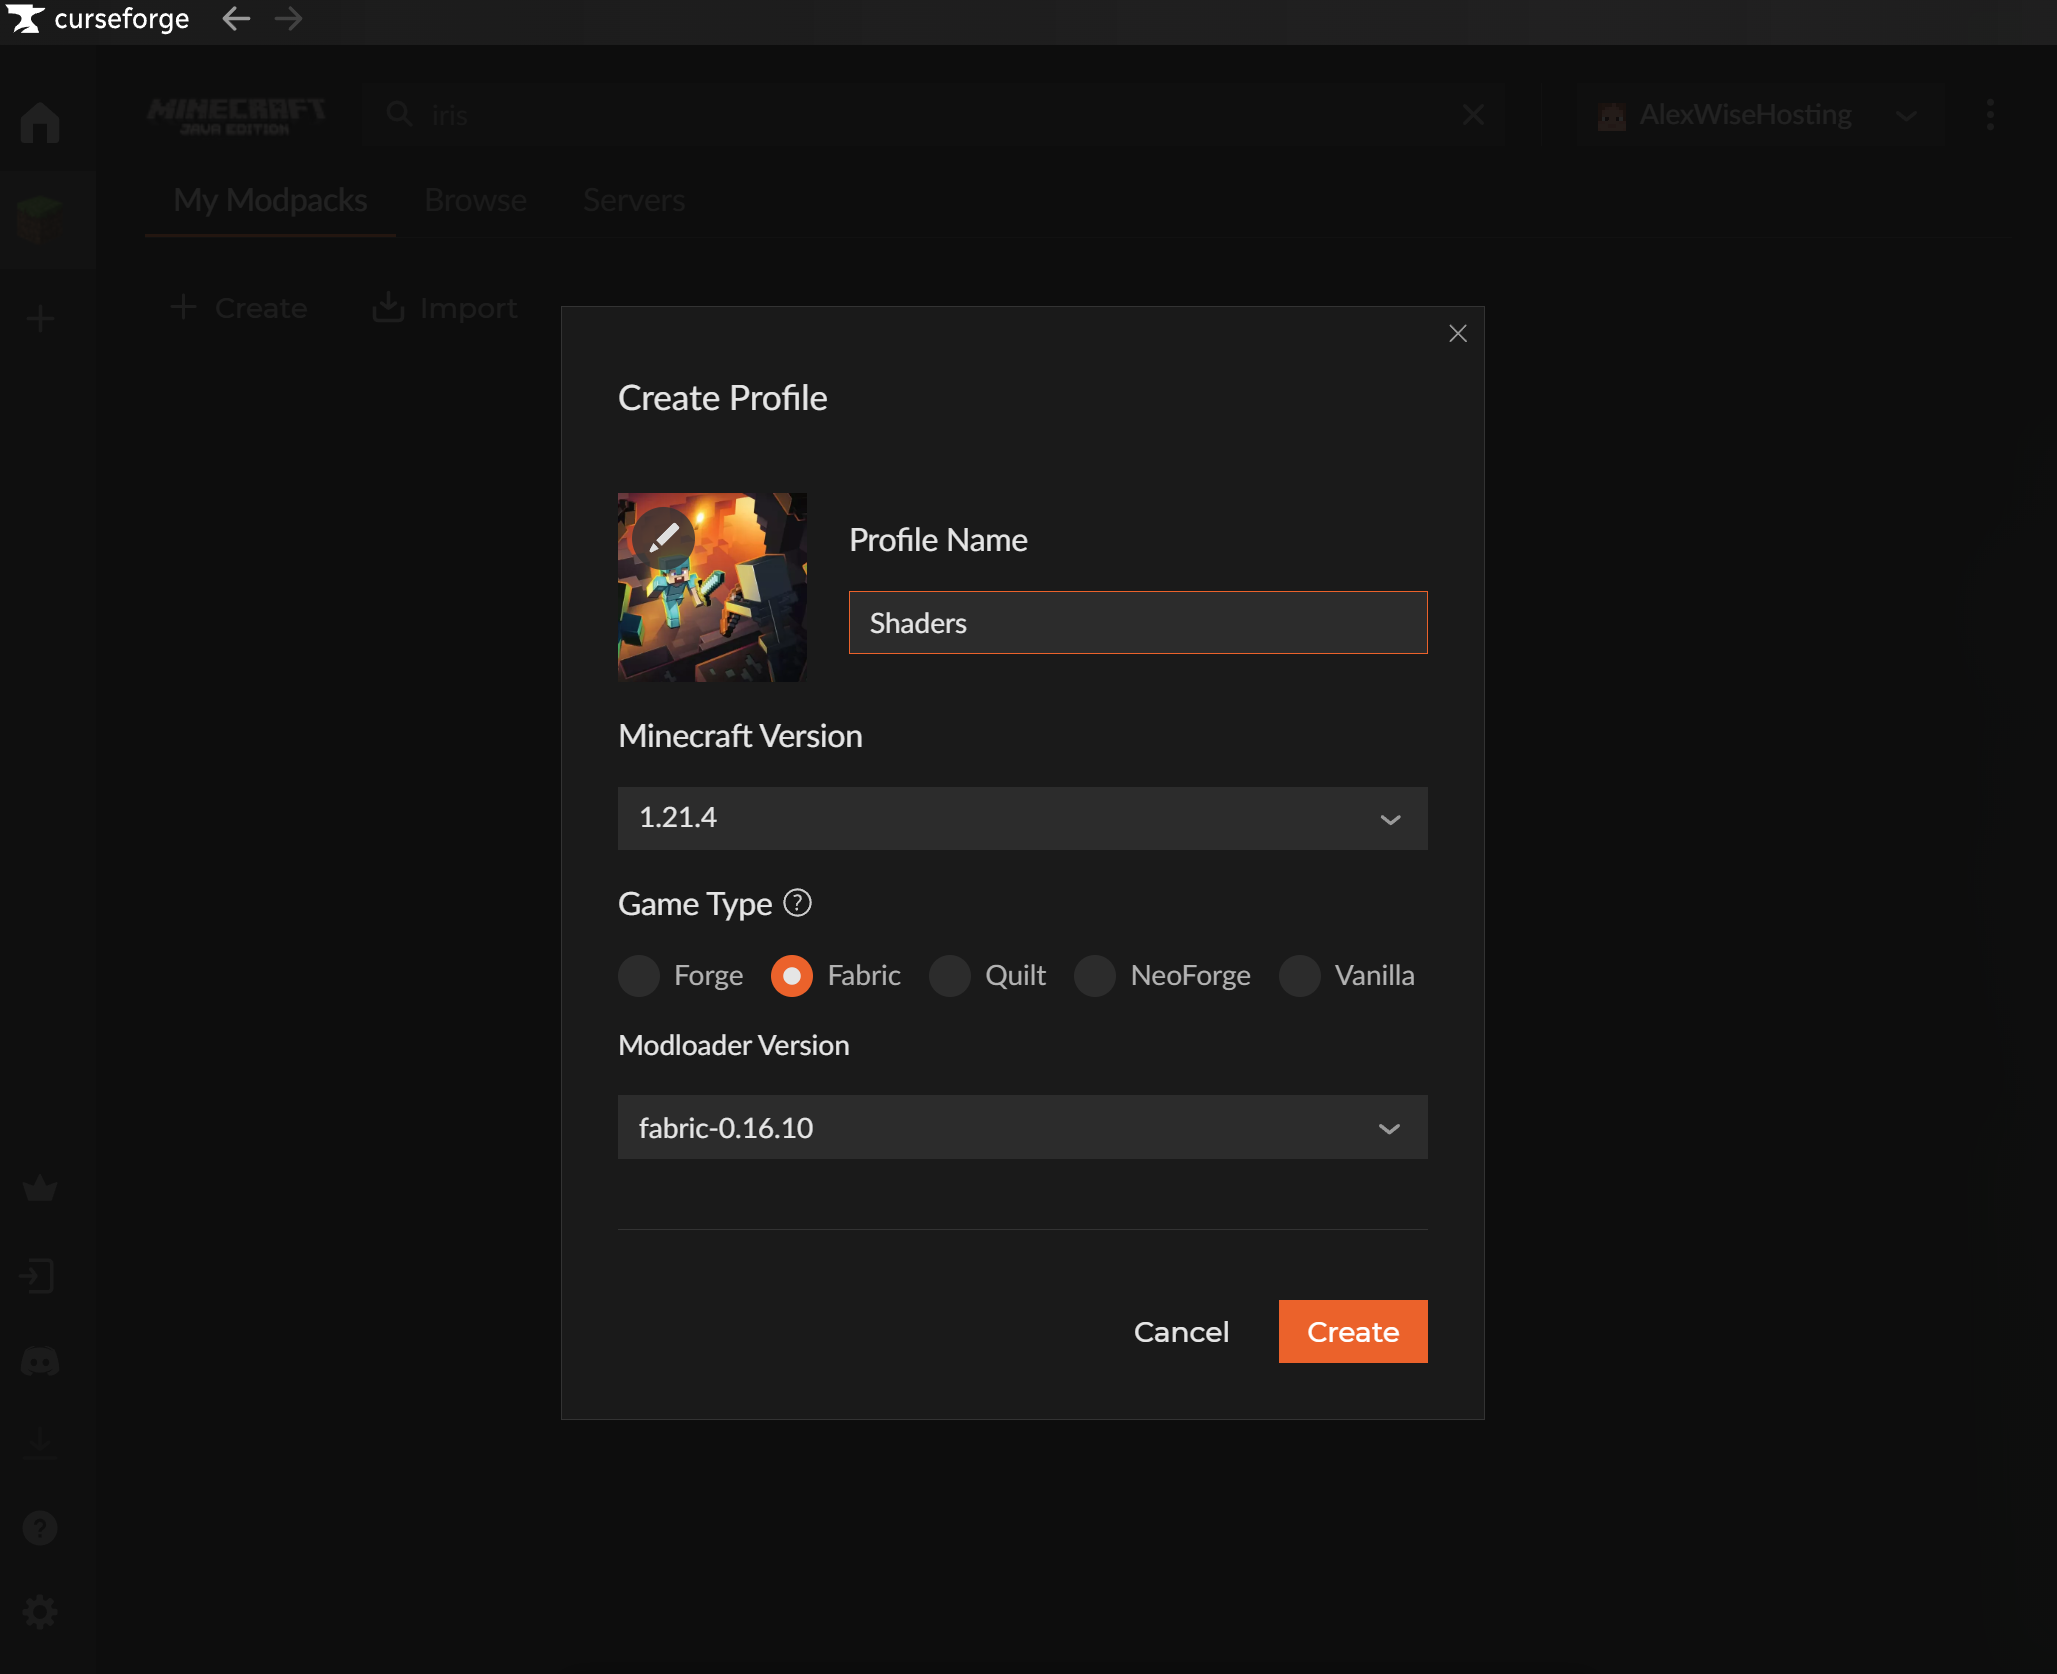
- Create a custom modpack profile in CurseForge App with Fabric or NeoForge game type. You can also use an existing modpack for this if the version supports Iris Shaders.
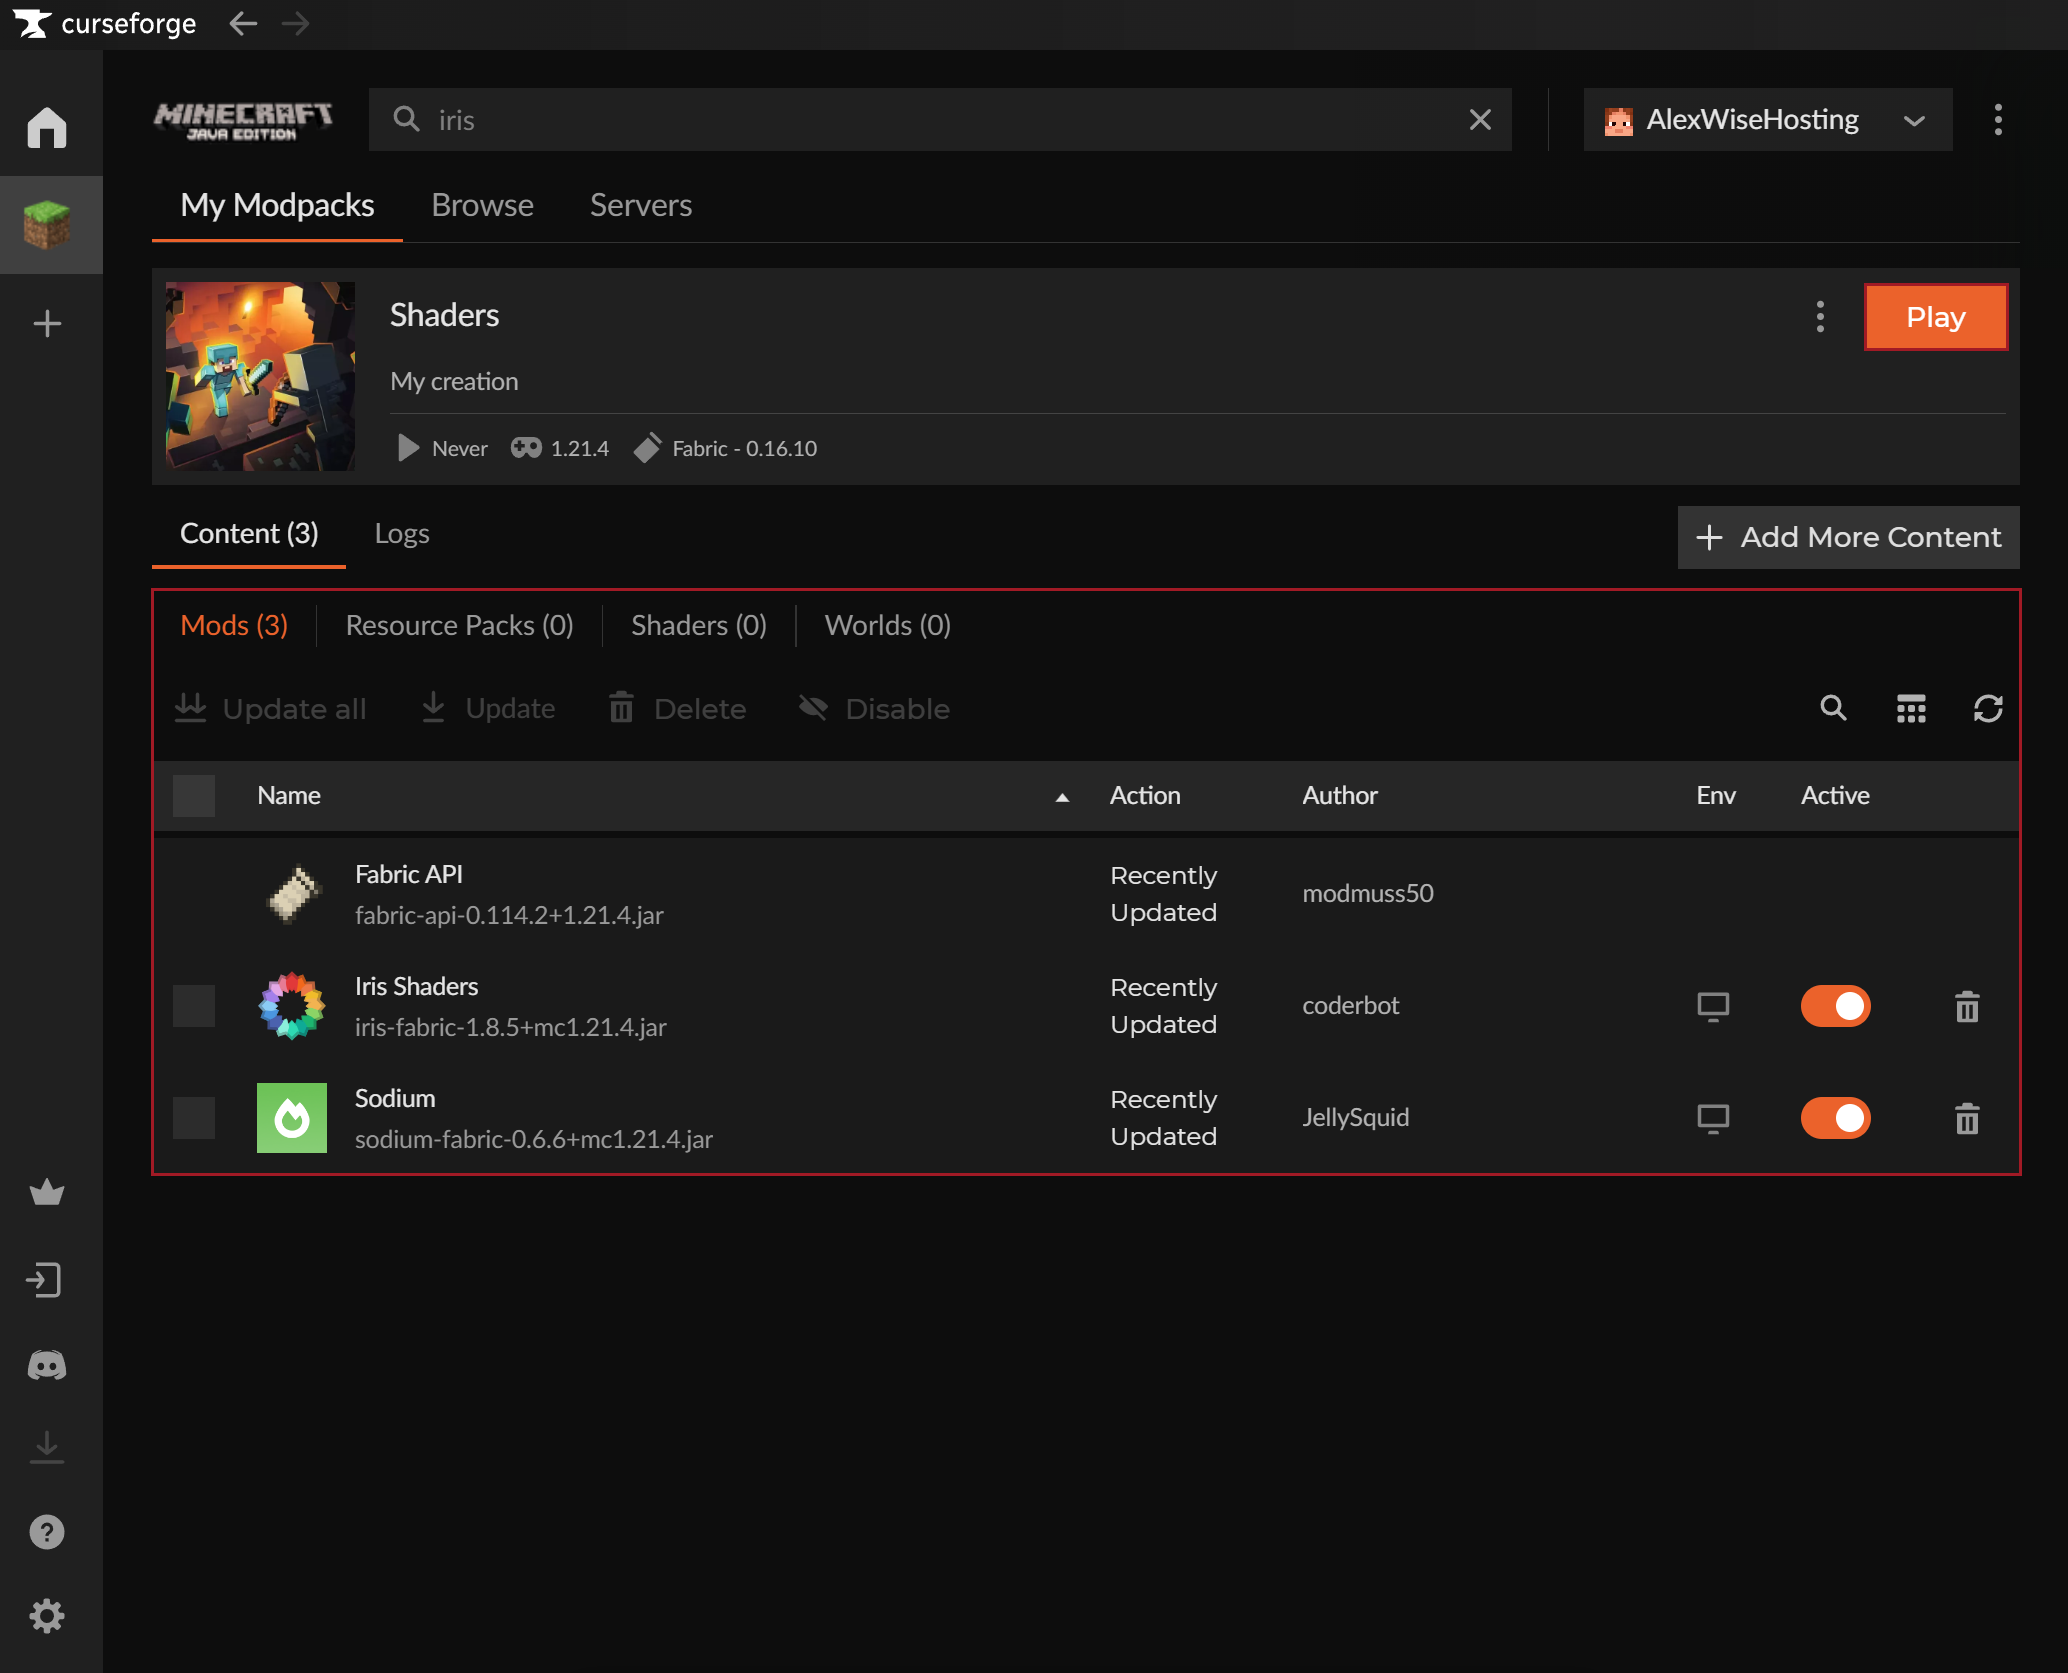
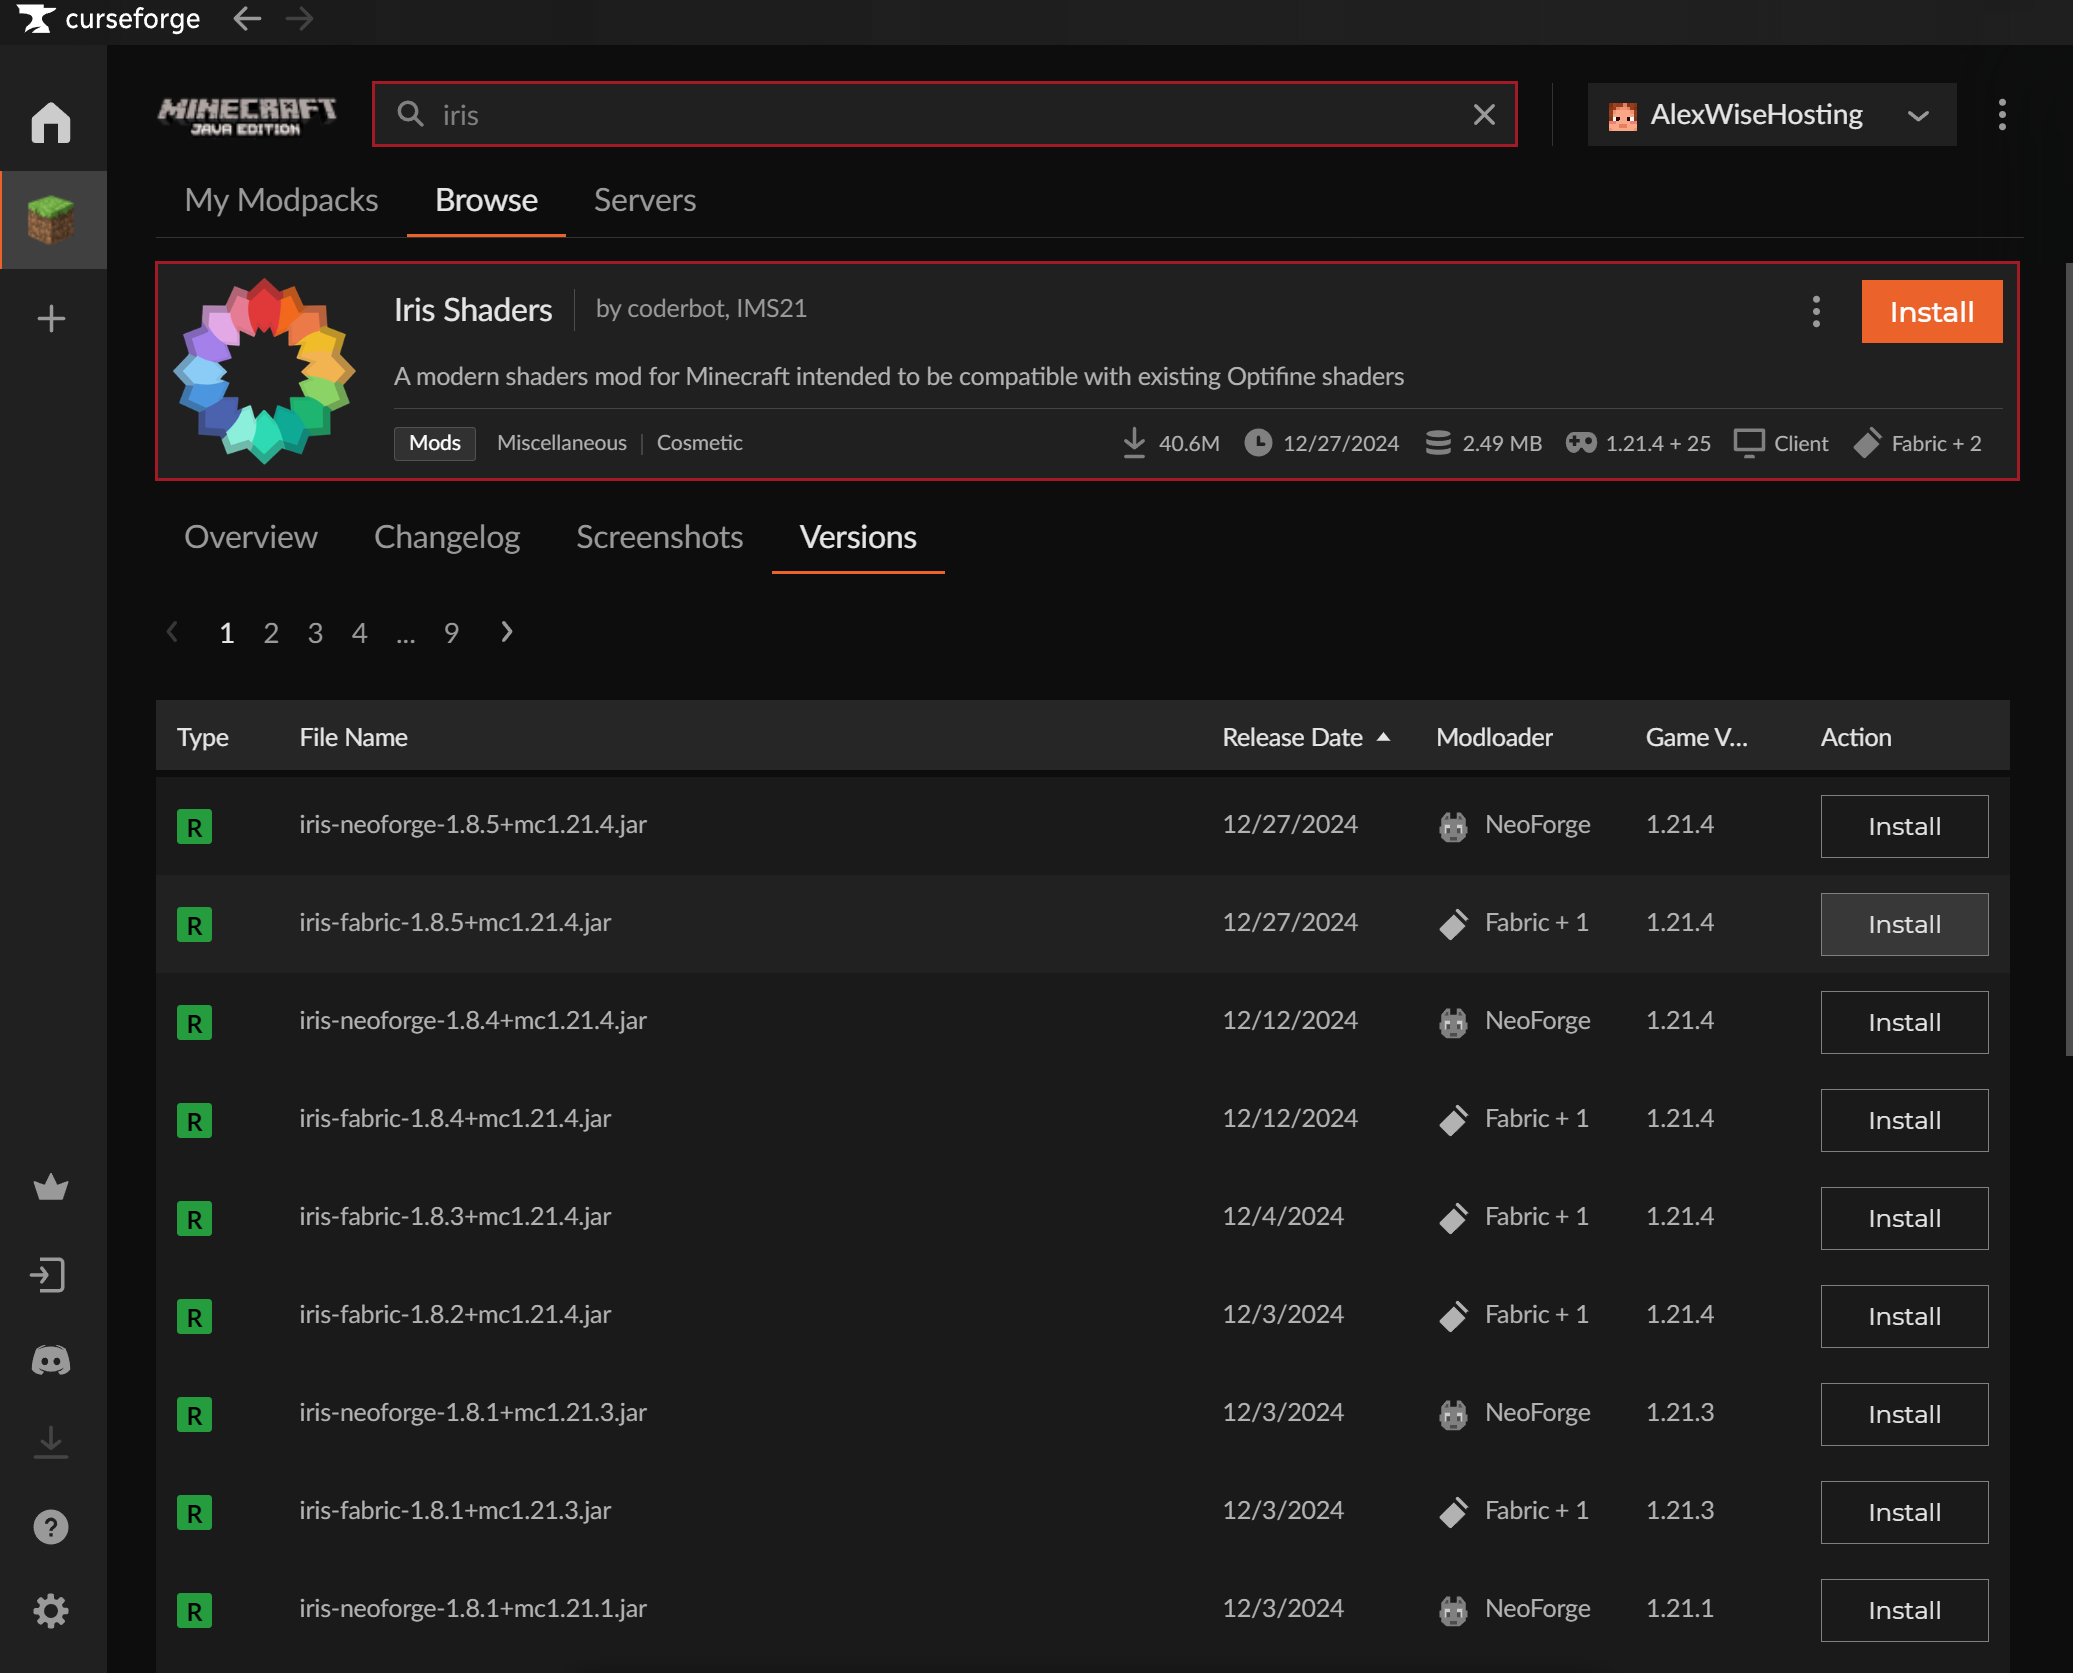
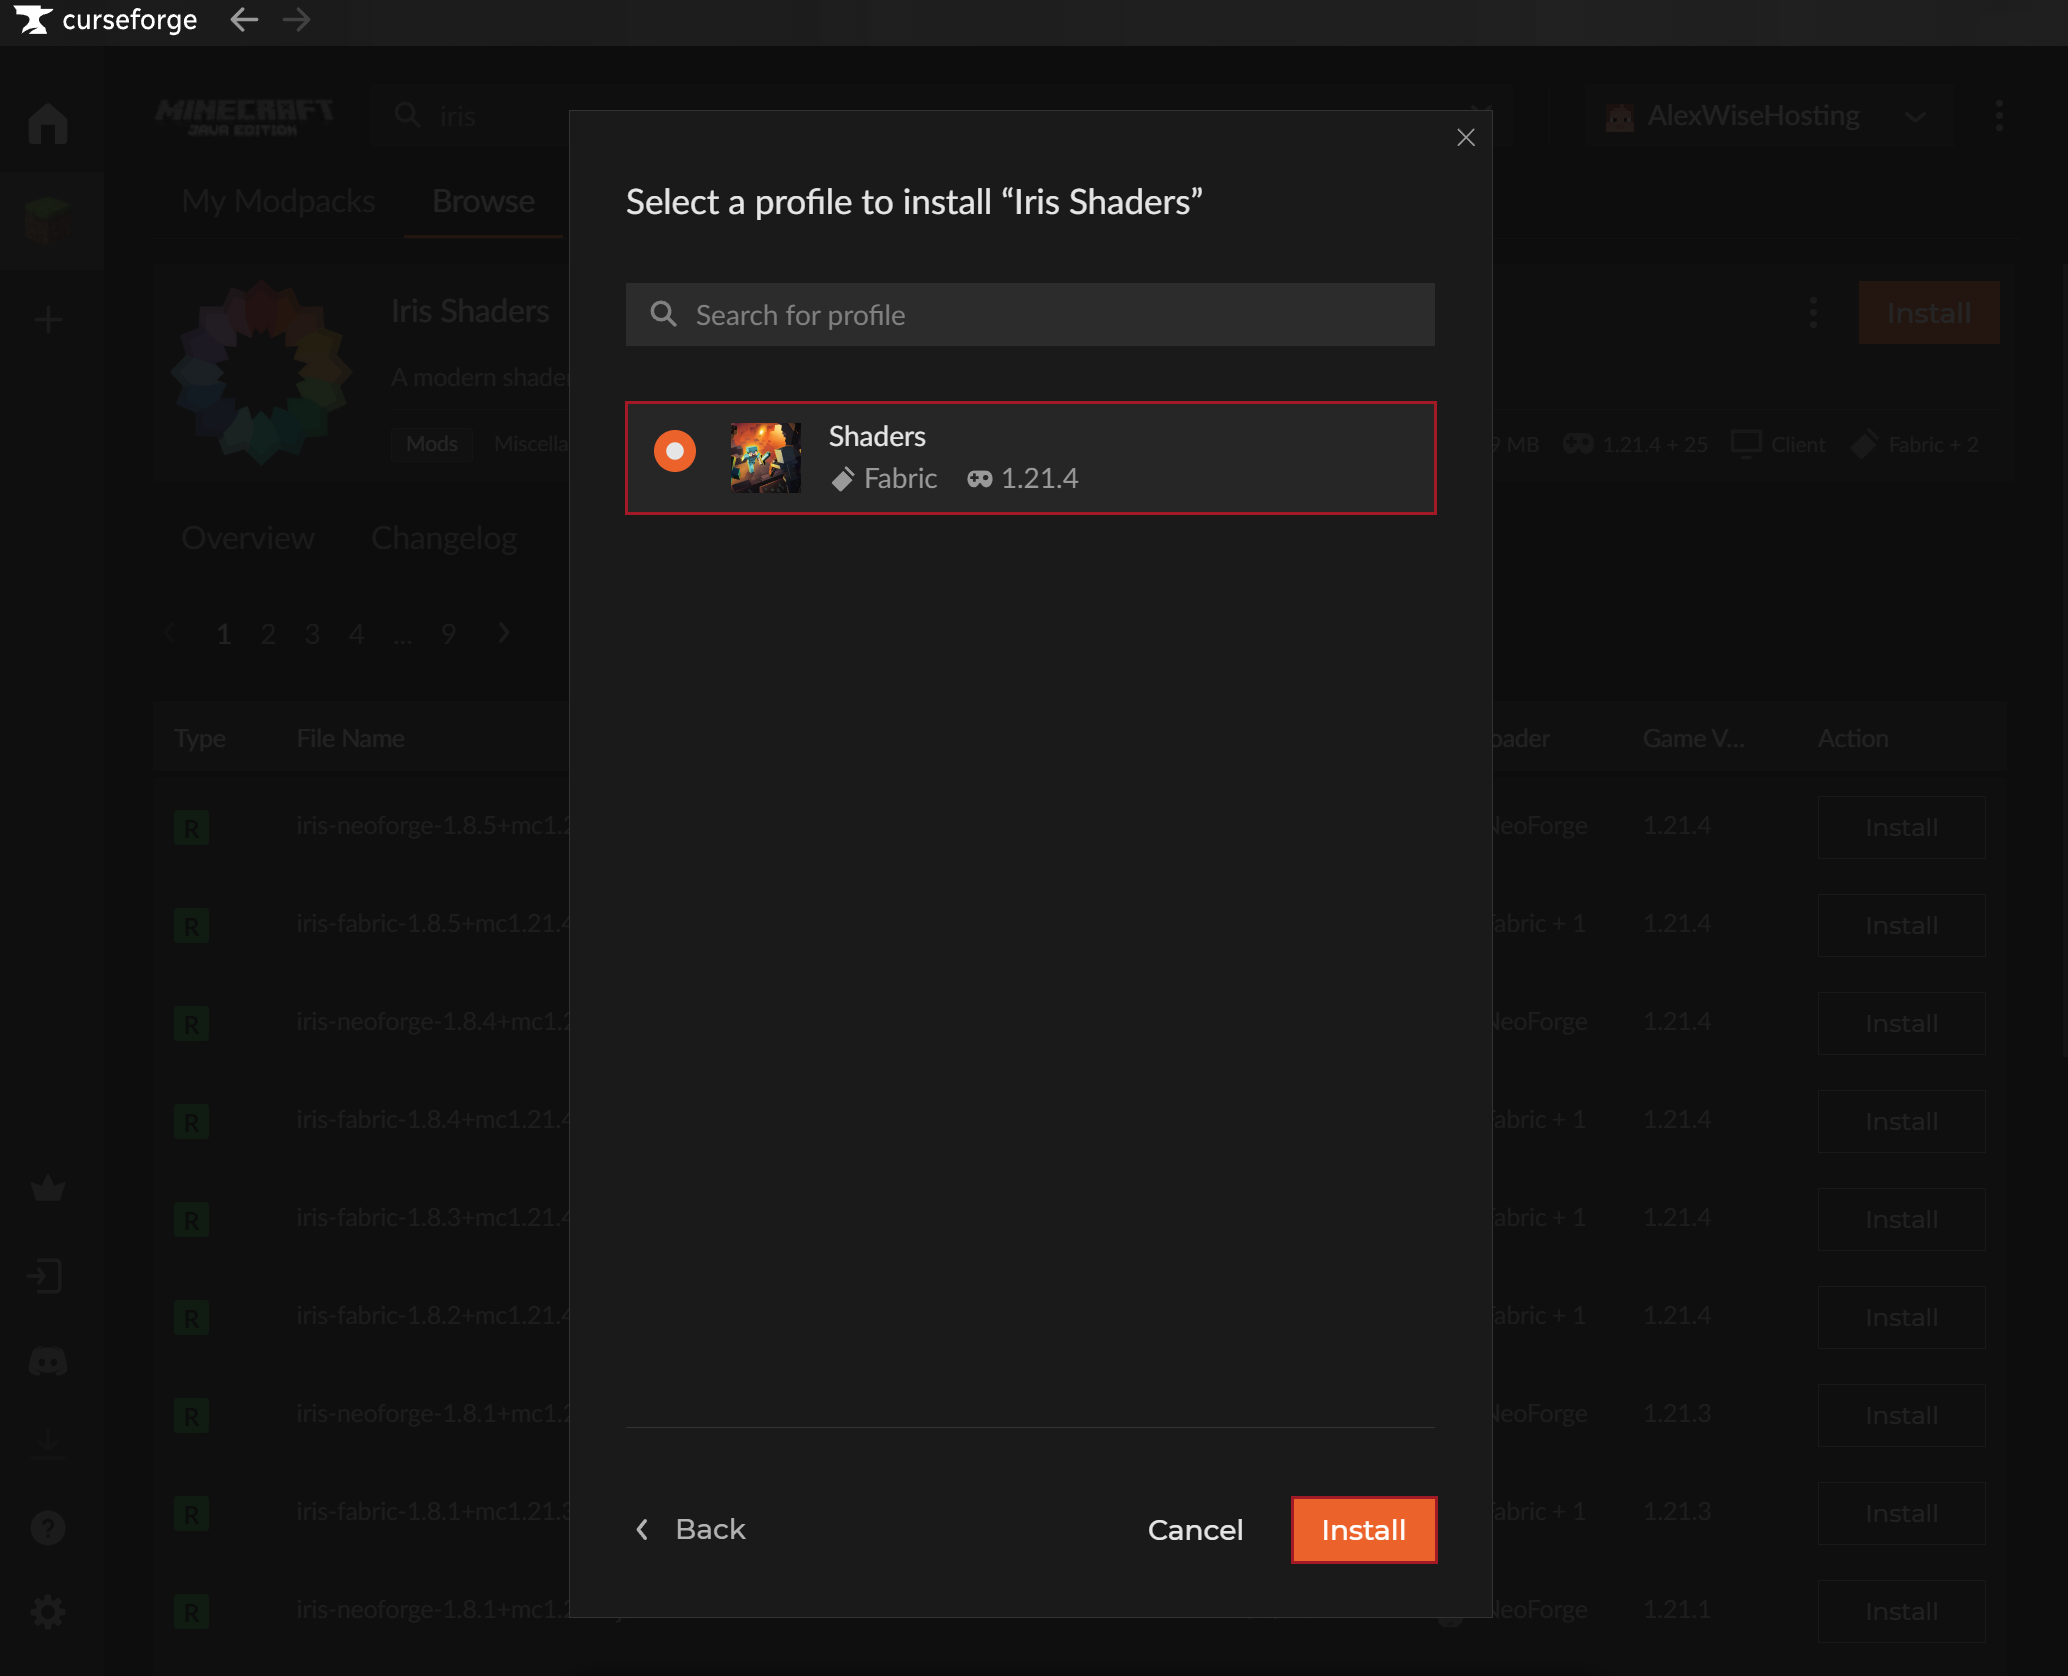
- Find Iris Shaders from the CurseForge App and install it to the custom modpack profile you made.
NOTE: Sodium is also required for Iris Shaders.
- Start up your game and go to Settings → Video Settings.
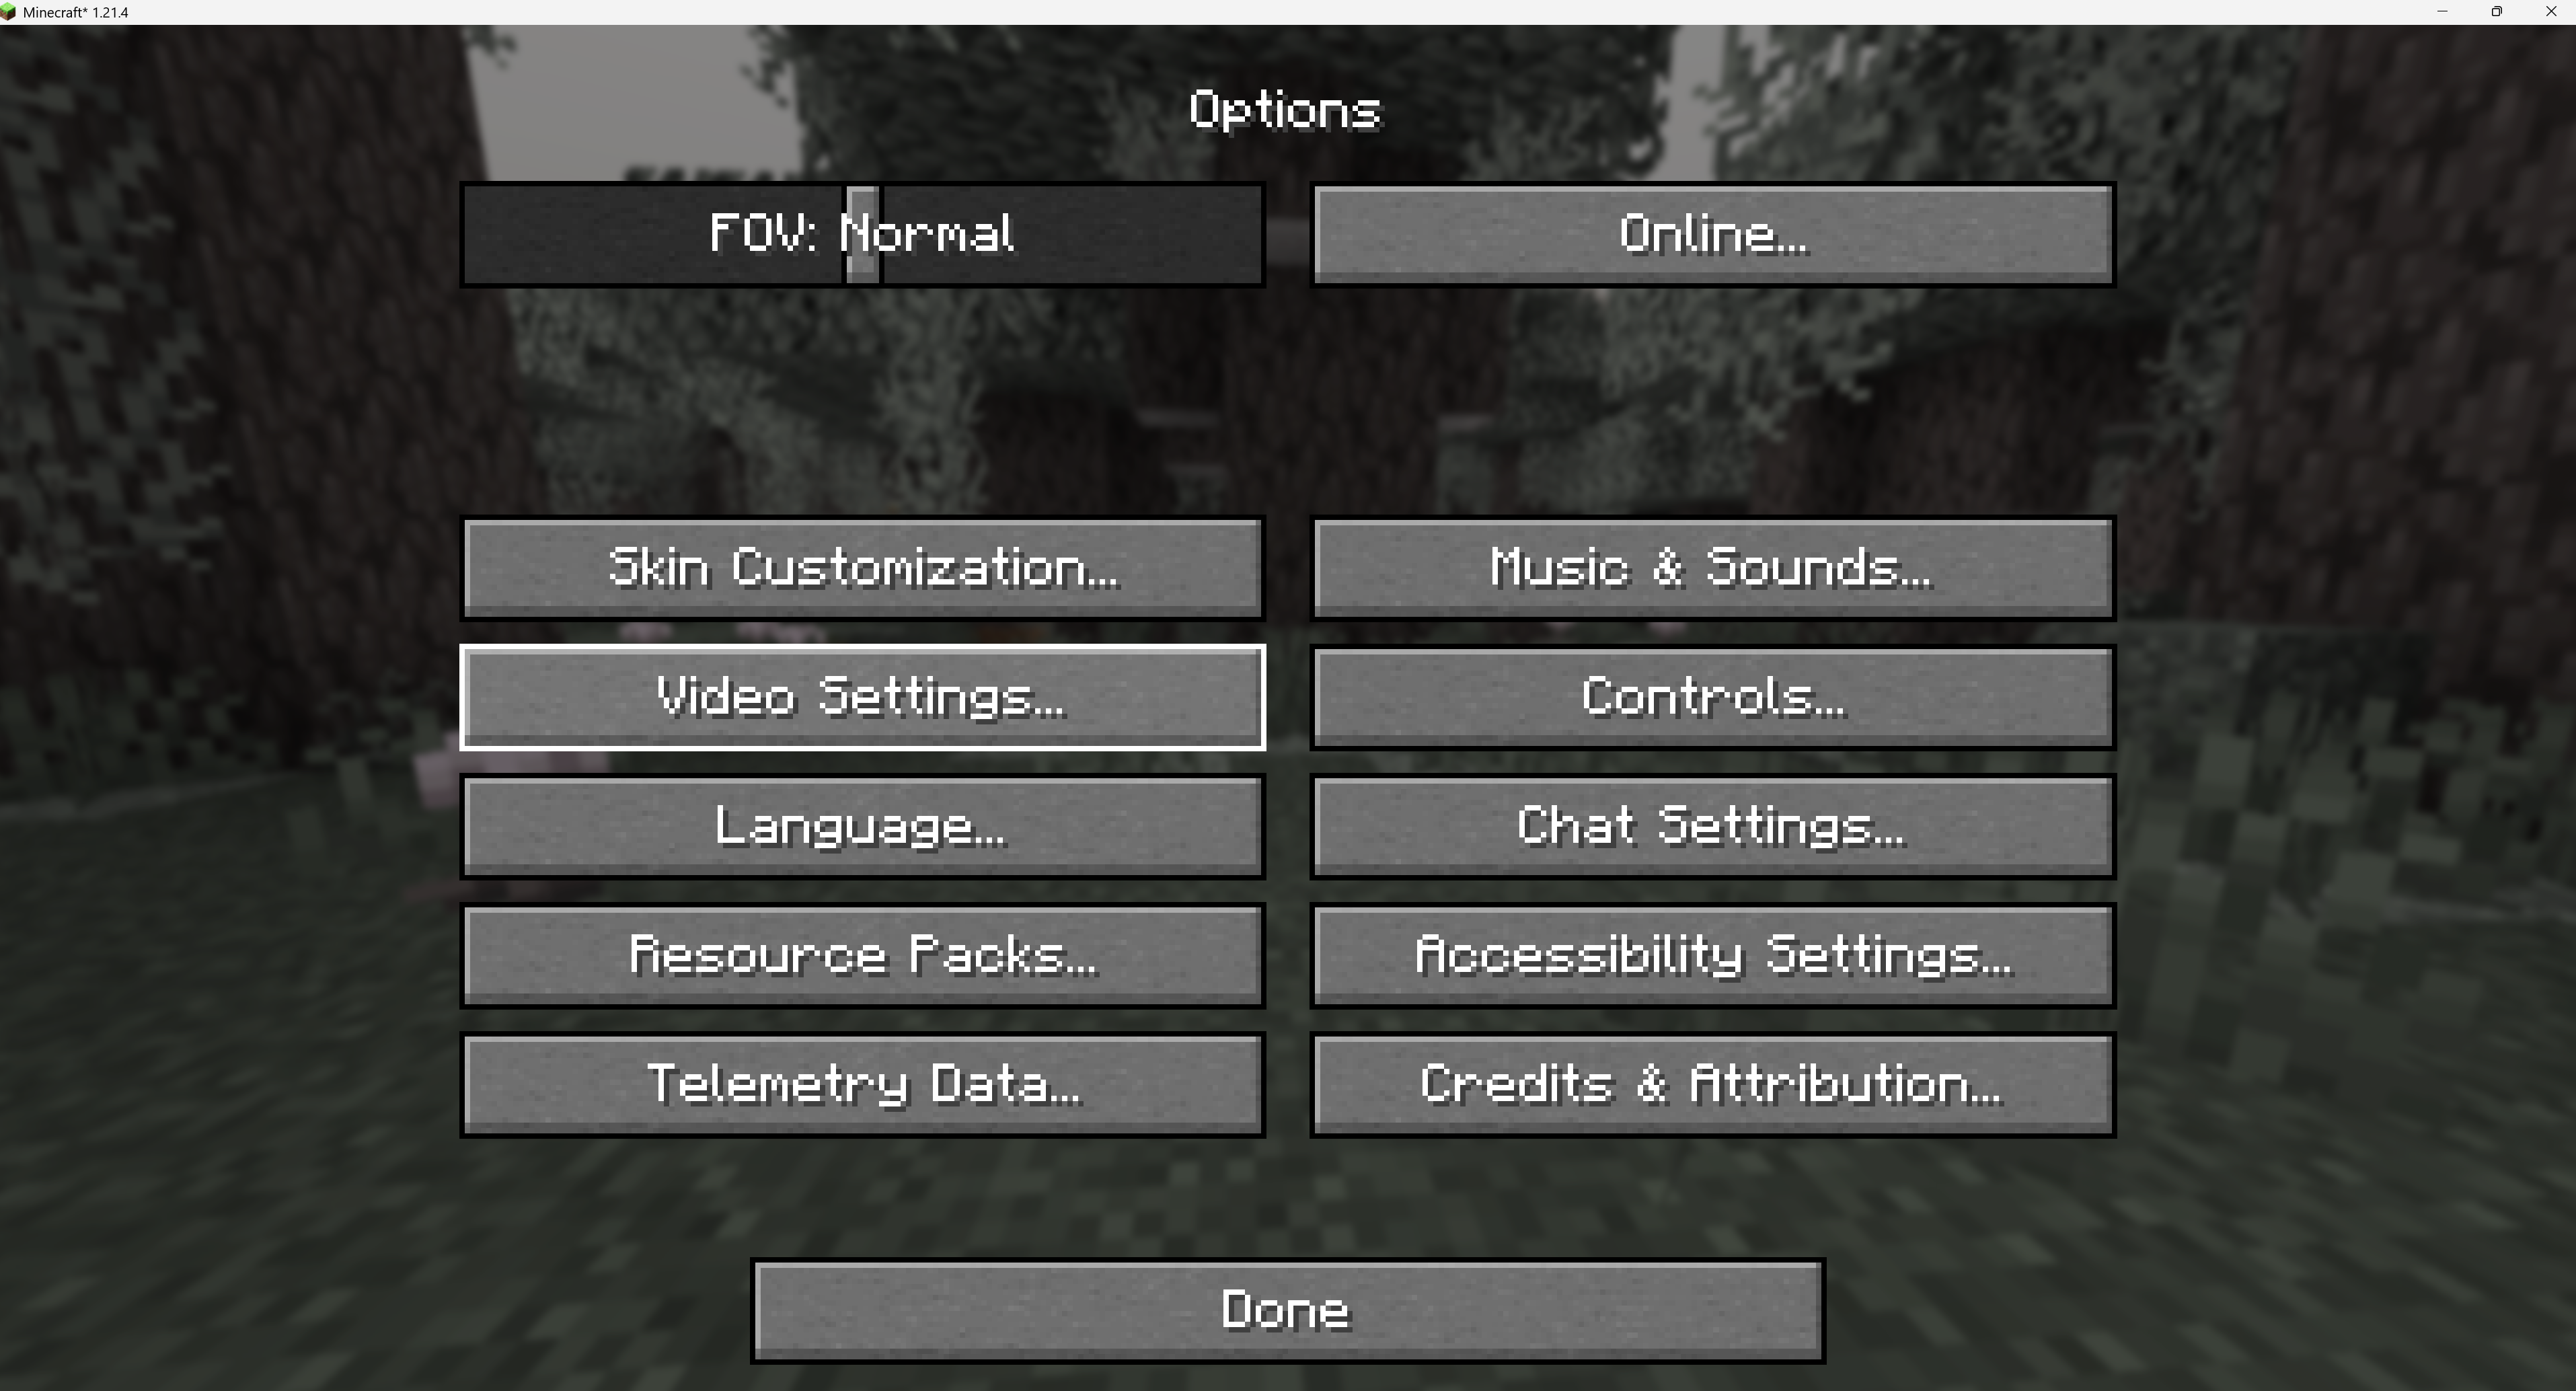
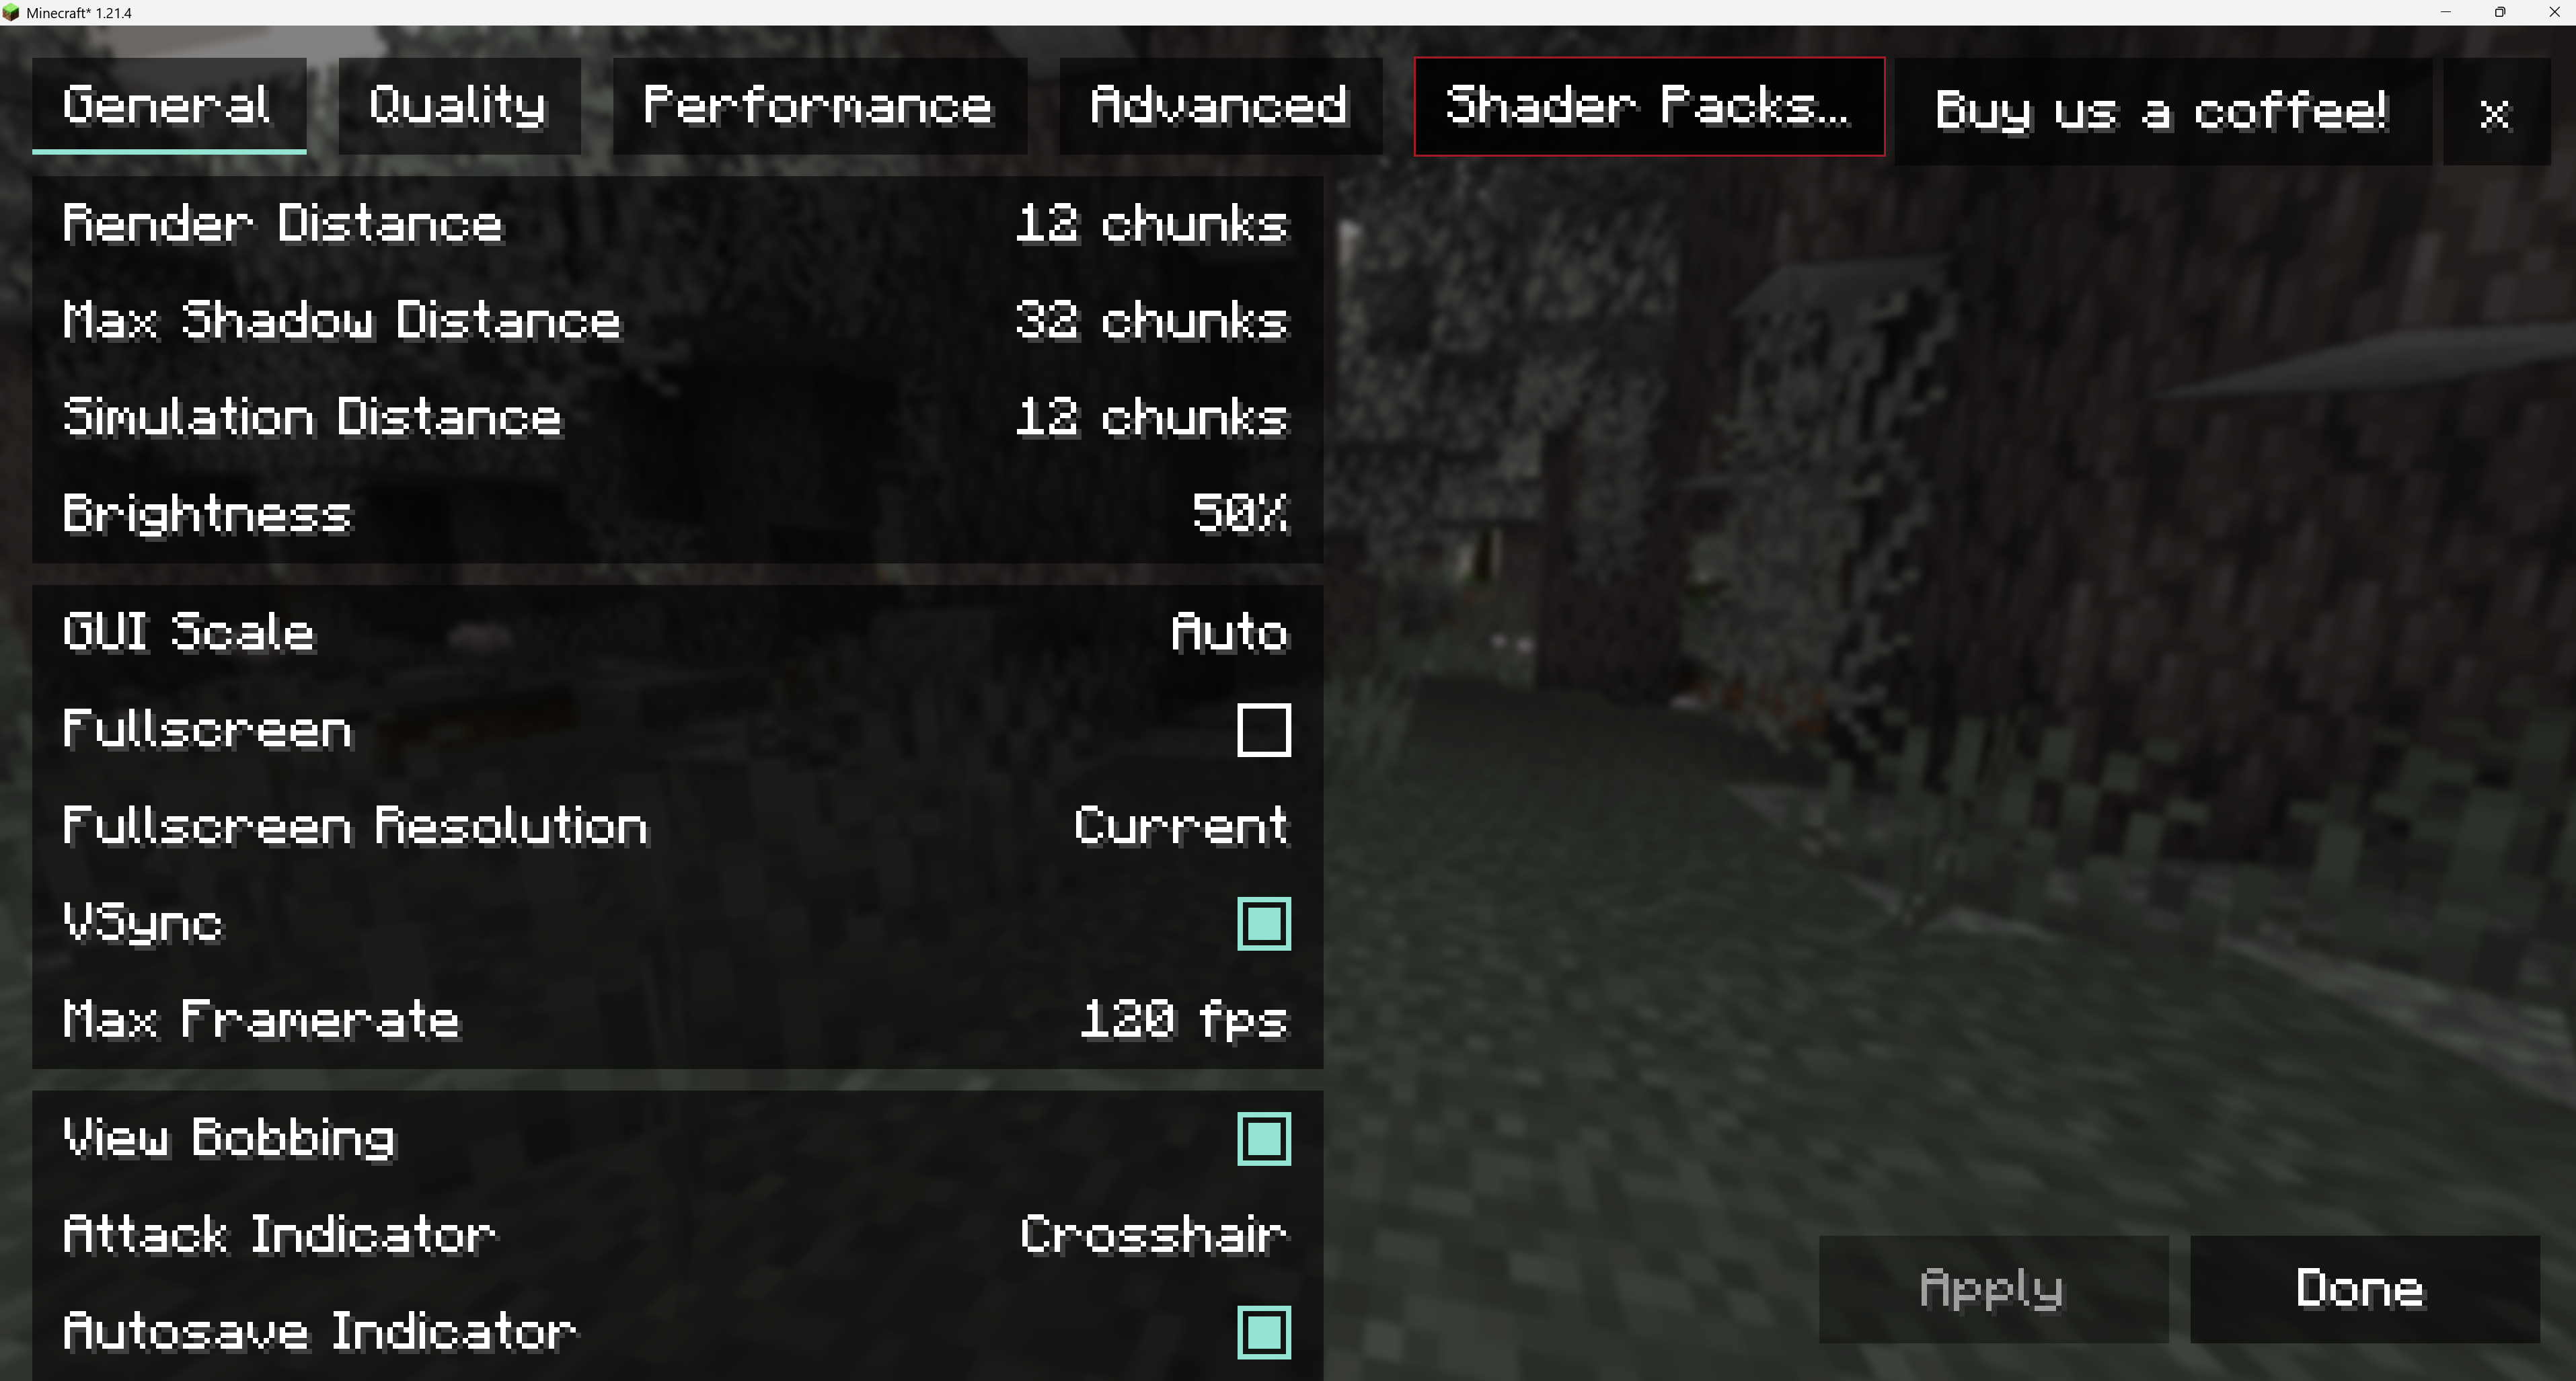
- In Video Settings you should see Shader Packs in the top menu.
- You can now just drag-and-drop your shaders to the shader packs list or Open Shader Pack Folder and upload the shaders there.
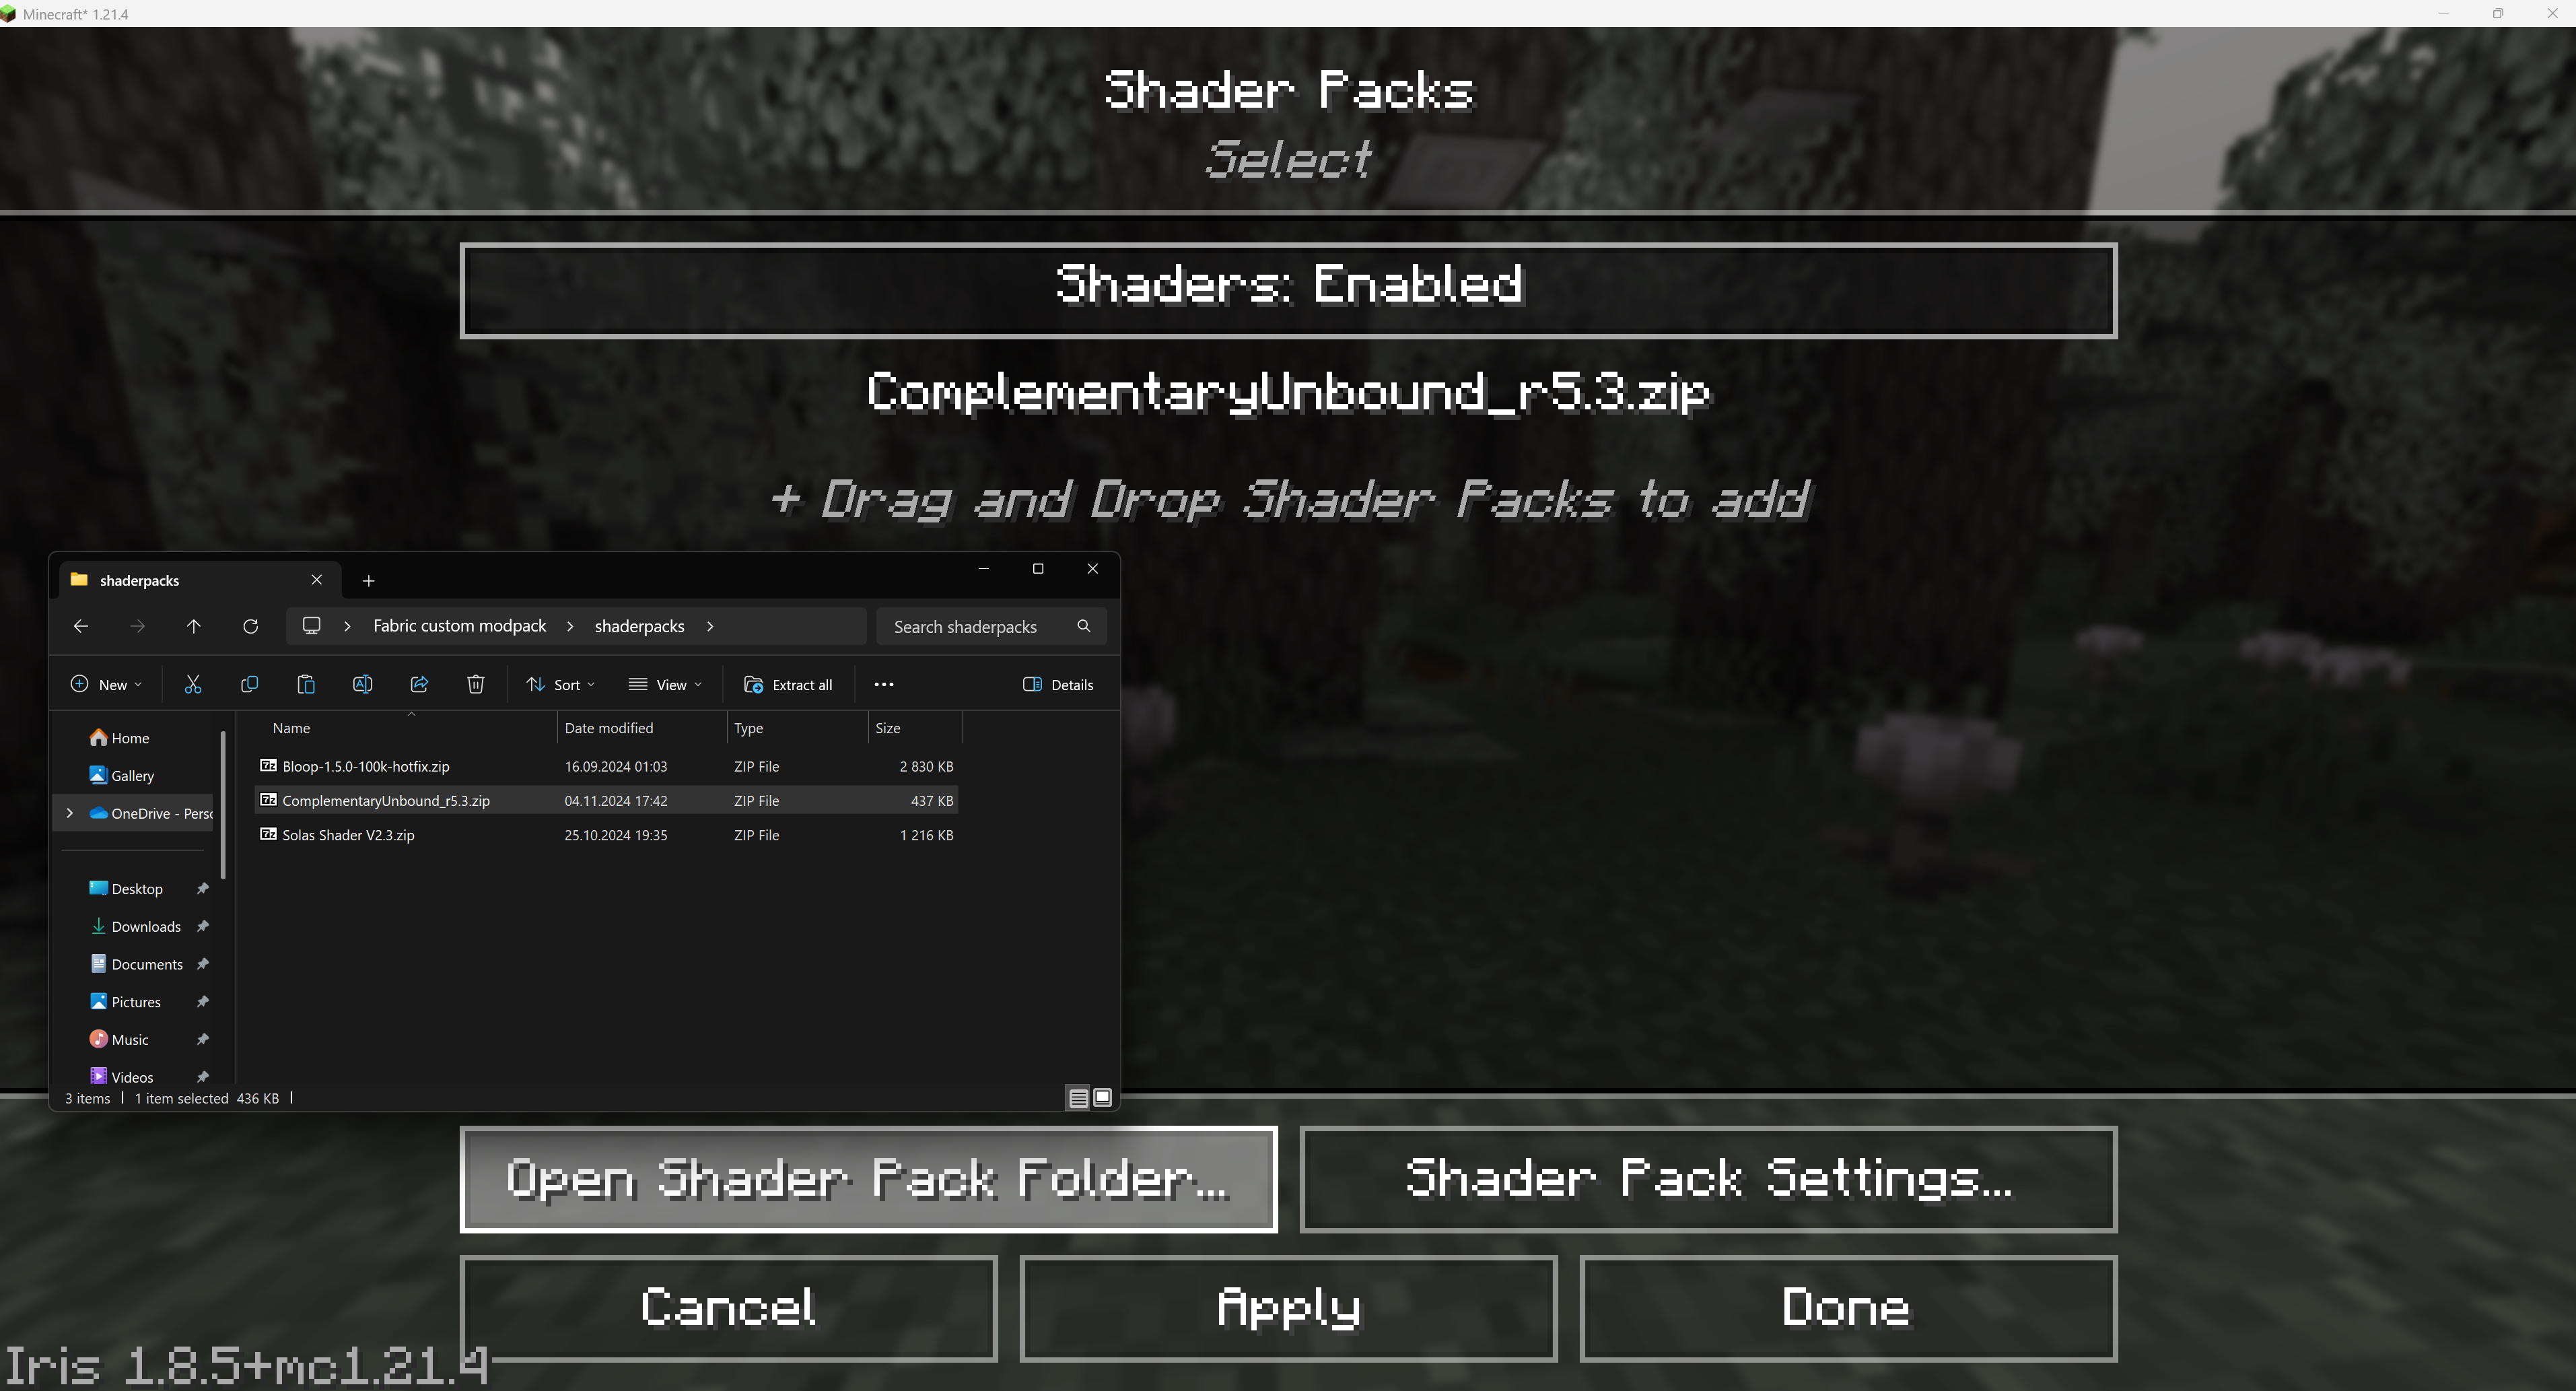
- Select the shader and click on the Apply button to enable the shaders.